
Recently I was working on a project using Segment tracking via their super helpful analytics library for Python, but was having trouble testing locally since all the tracking requests are sent encrypted via SSL. I wanted to view the contents of these requests via Charles Proxy, and to top it off I was running all this through Docker. Turns out it’s a bit of a challenge! Here’s how I configured things to do it.
Make sure Charles is configured for SSL Support
If you do any work around data collection, Charles Proxy is a fantastic tool that should be in your toolkit. I use it to monitor all outgoing analytics requests from my local browser or machine in a neatly organized UI. This works out of the box for non-encrypted HTTP requests, but these days most analytics calls are sent encrypted. That’s a very good thing, but it does make testing harder.
Charles works by proxying outgoing requests through a local server. To view SSL requests in plaintext, you first need to install the Charles root certificate. The steps for this are different depending on which platform you’re working on, but the Charles site has helpful guides:
https://www.charlesproxy.com/documentation/using-charles/ssl-certificates/
Do this for the OS you’re using, and then we’re also going to need the actual certificate file somewhere accessible to Python. You can save the cert file (.pem) from the Charles client directly (Help > SSL Proxying > Save Charles Root Certificate…)
Segment’s Python Library
Segment supports a clientless API for making tracking requests, and one of the easier ways to do this is via their Python library. The “analytics-python” library uses the standard Python “requests” module, and by default these requests are sent encrypted and will fail if you try to send them through Charles. To fix this, configure your script to trust Charles’ root certificate when making requests. Add these lines to the top of your script:
import analytics
from analytics.request import _session

analytics.request._session.verify = "charles-ssl-proxying-certificate.pem"
We’re pointing this to the Charles root certificate file you saved earlier.
Voila! Now your requests should no longer fail, and you’ll be able to view them in plaintext in Charles.
Proxying to Charles with Docker
I’ll admit, sometimes I hate Python. The whole Python 2 vs Python 3 problem and version dependencies for the various libraries are an absolute pain to work with.
I get around this by using Docker whenever I need to deal with Python. By throwing the right Python version and library dependencies into a lightweight container, I can simply avoid that whole mess. But it does add an extra step if you’re trying to proxy network requests that originate from the container.
Docker has details on how to do this in their docs. Here’s how to configure your containers to use Charles’ local proxy:
- Navigate to your Docker config file (for the user you’re using to start the container):
~/.docker/config.json
- Edit this file to add lines for httpProxy and httpsProxy, pointed to Charles’ local proxy (default: localhost:8888):
{
 "proxies":
 {
   "default":
   {
     "httpProxy": "http://127.0.0.1:8888",
     "httpsProxy": "https://127.0.0.1:8888"
   }
 }
}
Now, your Docker containers should pass network requests through Charle’s local proxy where they can be viewed and/or decrypted for plaintext viewing.
Using Charles to View SSL Requests
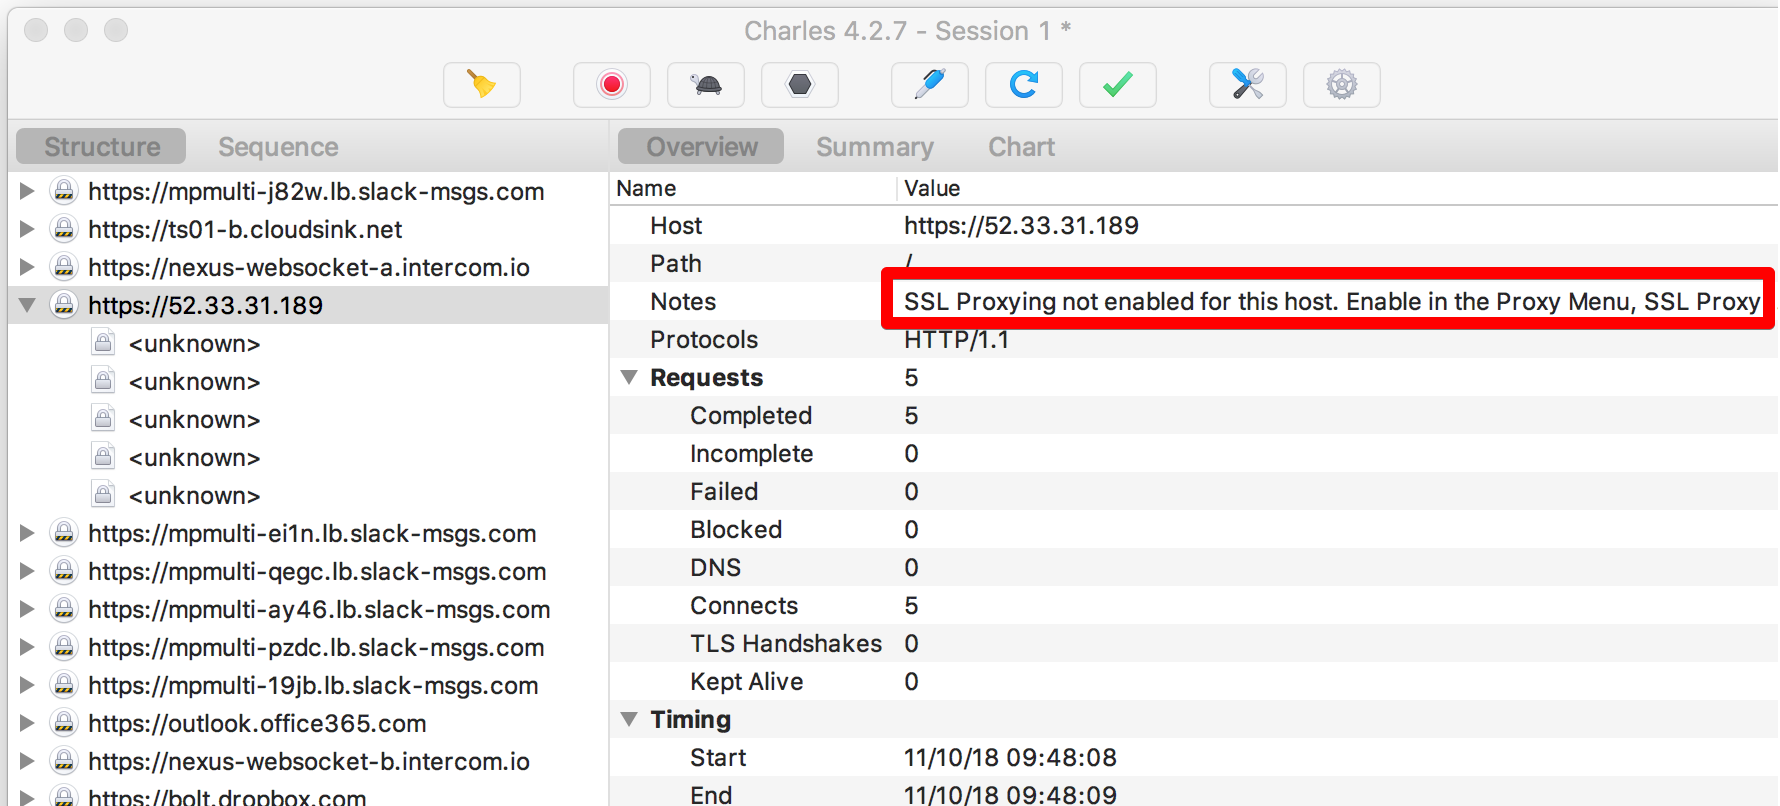
The last step here is to tell Charles to enable SSL proxying for the domain we’re sending requests to:
- Send a request, make sure it appears in Charles (will have an SSL lock icon):
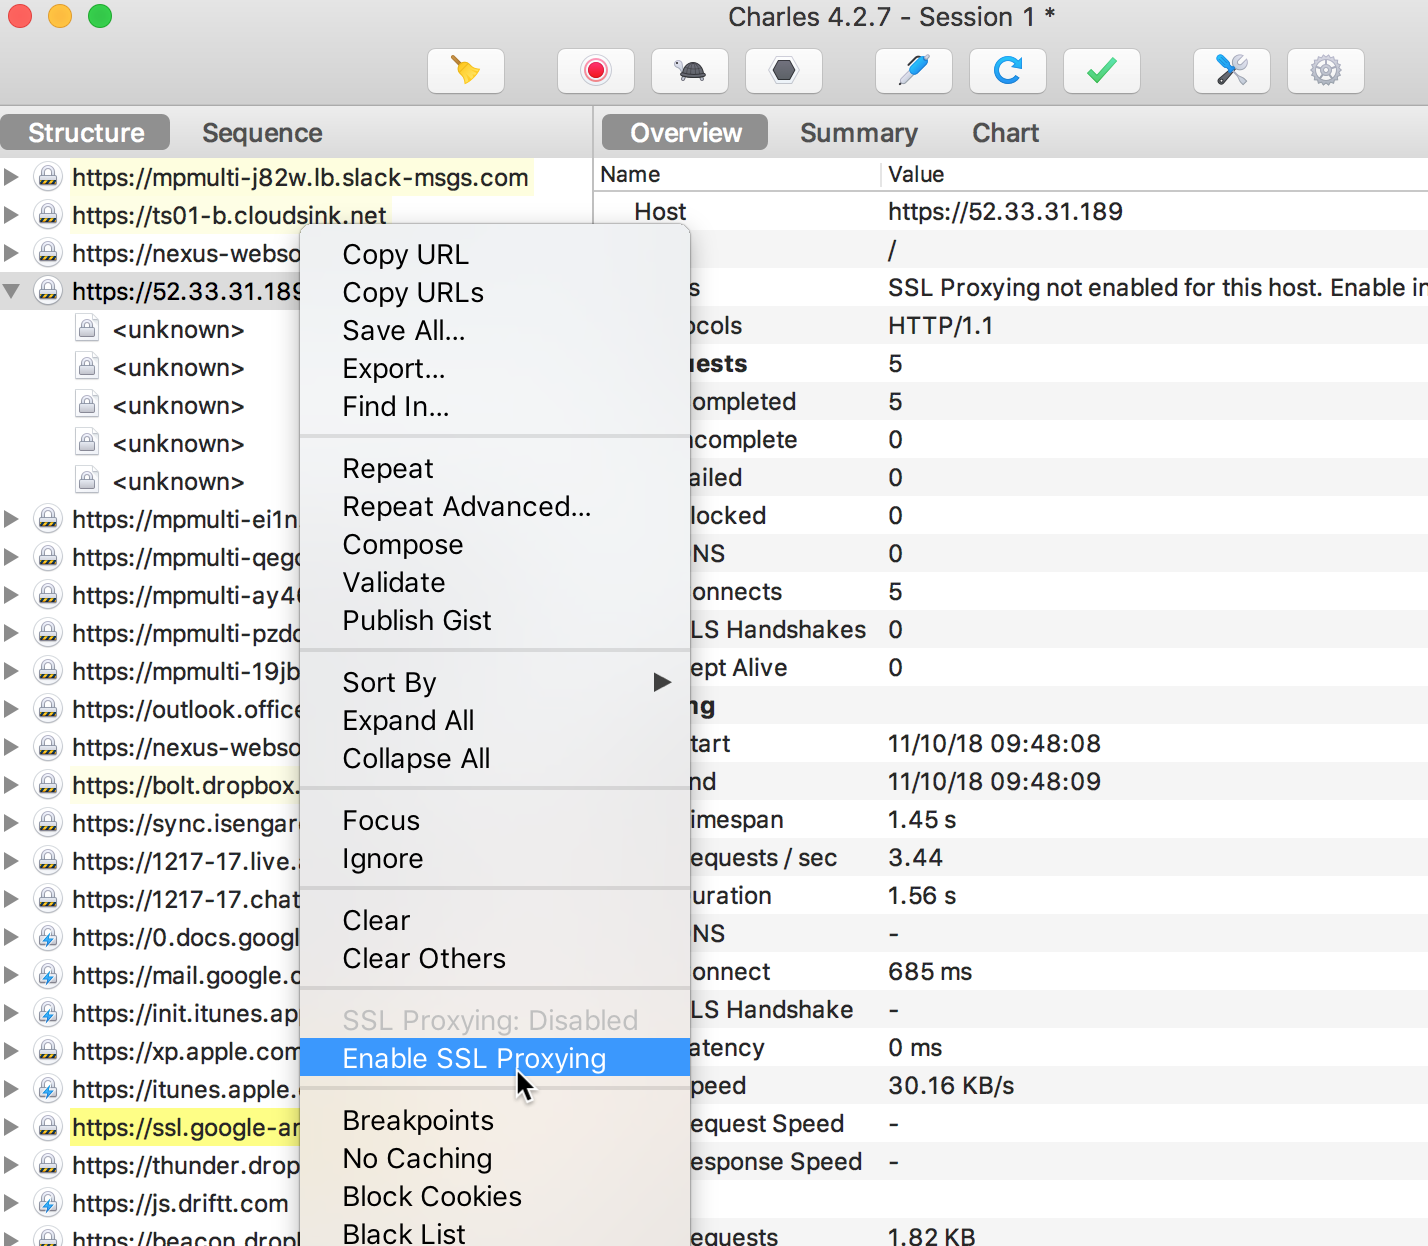
- Right click on the domain, and select “Enable SSL Proxying”:
- Send another request, and it should appear at the bottom of the list (without an SSL lock icon):
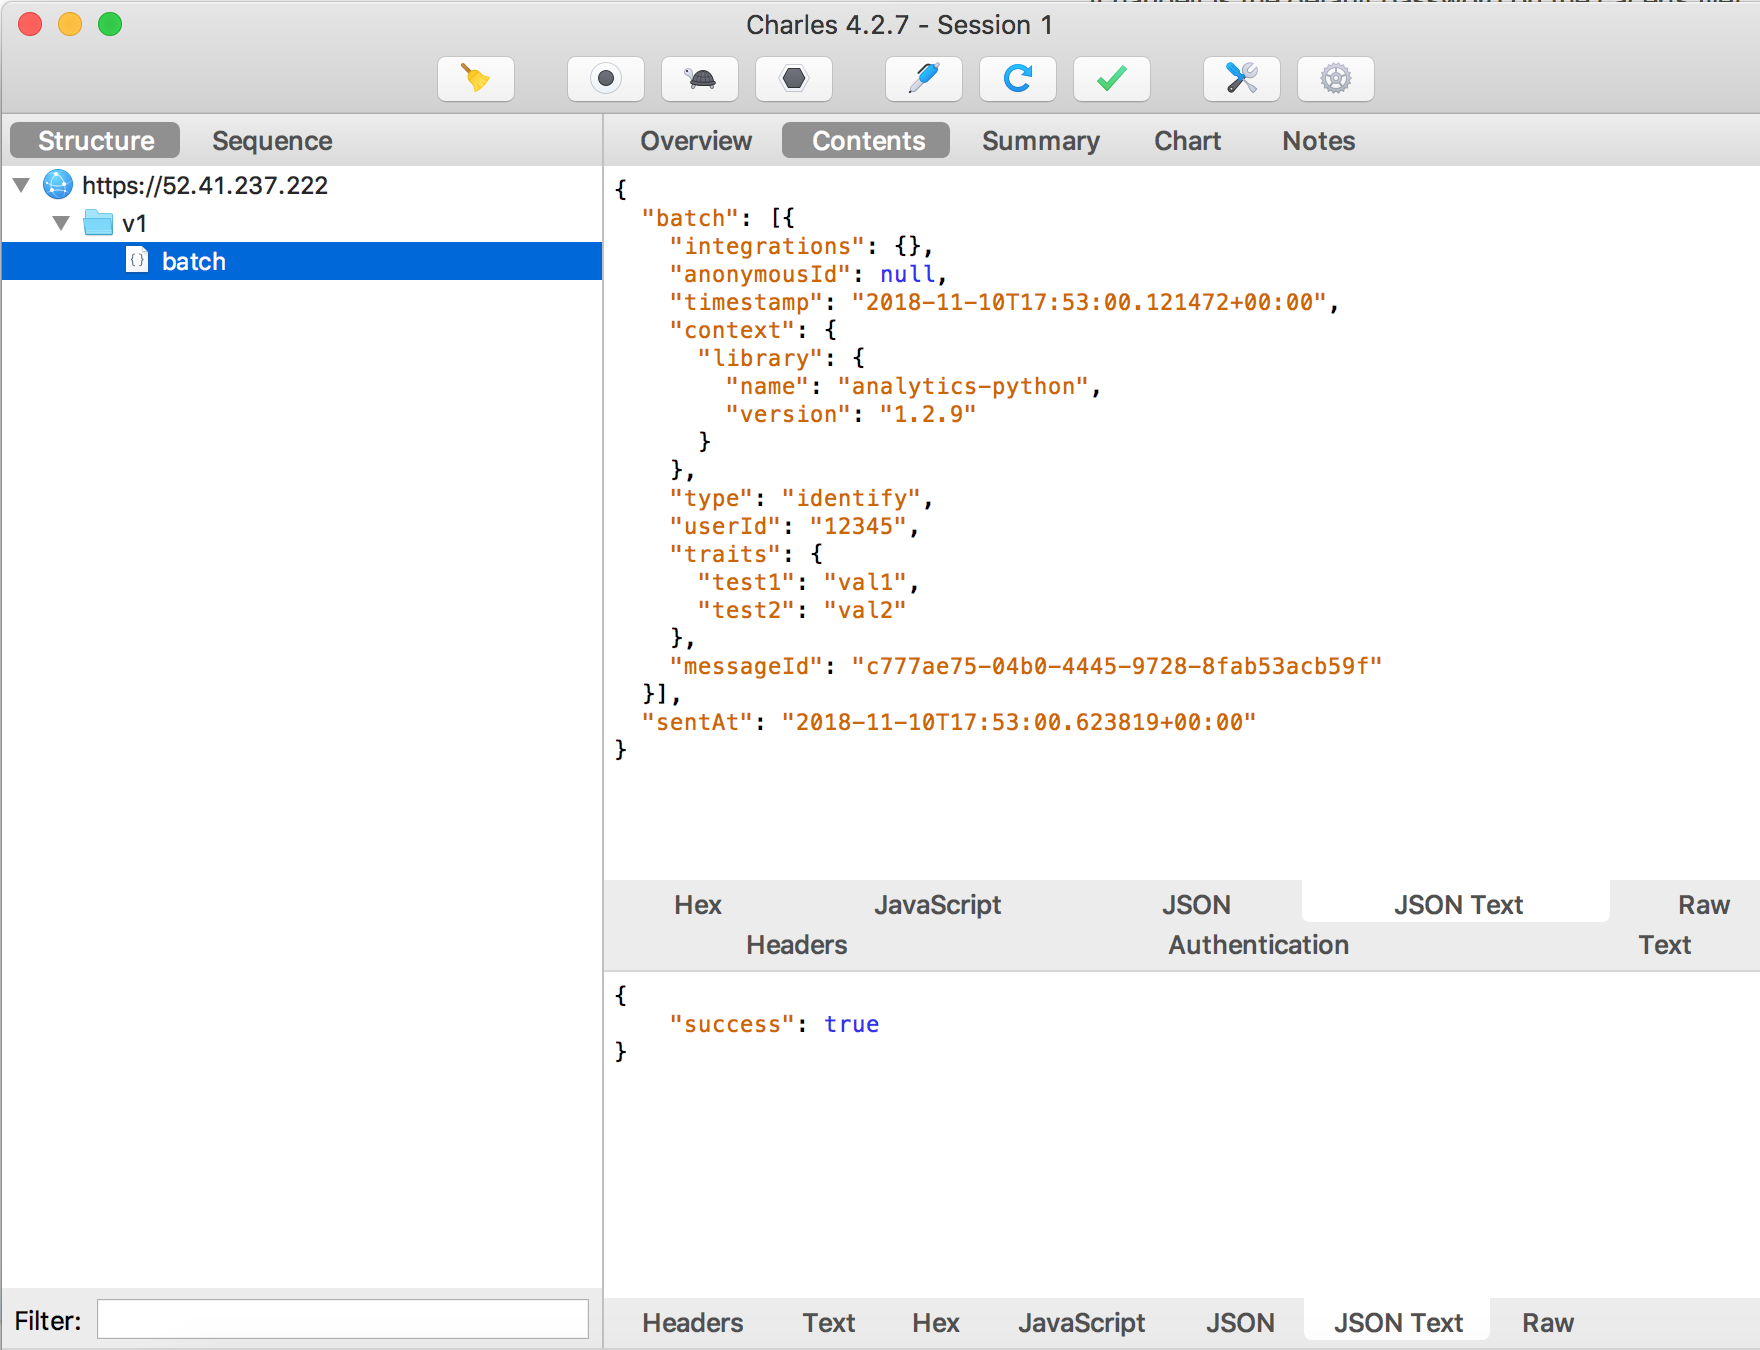
That’s it! Now you should be able to view the keys/values sent on each request.
Hope this helps someone.